Saturday, December 29, 2012

Sweet Potato Pancakes- a Leftovers Recipe

We have so much food leftover from the holidays!  Between Christmas Eve and Christmas Day, I feel like we will never have to go to the grocery story again (actually, that is a lie- I went today to get ingredients to make new things with the left overs).  My husband is pretty good about leftovers- as long as I mix them up a bit.  Tomorrow we are going to have bean soup (with leftover ham and potatoes), and we have been eating Turkey and Dressing for days.  I also made a big batch of Macaroni and Cheese with leftover cheese cubes.  This morning I felt it was time to do something with the sweet potatoes.  I made my Candied Sweet Potatoes in Orange Cups for Christmas day, I felt sure there was something exciting I could do with the leftovers.  Enter, Pancakes.  These were amazing.  I would probably make more sweet potatoes to make these pancakes again.


You Will Need:
1 Serving Candied Sweet Potatoes in Orange Cups , orange cups discarded or 1 cup left over sweet potatoes
1/2 cup Bisquick (I used the gluten free Bisquick)
1/2 cup milk
1 egg

Directions:
Mash the sweet potatoes in a bowl and mix in the rest of the ingredients.  Coat a skillet with cooking spray and drop spoonfuls of the batter on the hot pan.  The batter is thicker than regular pancake batter, so you might have to spread it out with the back of a spoon.

Don't eat it straight from the bowl- there is raw egg!

Cook a few minutes per side over medium heat, flipping with the pancake begins to puff up.  Serves 2.  My husband ate the whole batch by himself.  At 15 grams of protein, and 430 calories (plus the butter and syrup), he was certainly full- but he really enjoyed them.

Nutritional Information per serving as calculated by My Fitness Pal

Sunday, December 16, 2012

Orange Scented Sweet Potatoes

I love so many different holiday foods, but I think this is one of my favorites.  Orange Scented Sweet potatoes.  The candied part is a little misleading...mostly because over the years I have cut out a lot of the "candy", however I still follow the same basic steps I learned from my mom.  You can really use any sweet potato recipe- baked, mashed, candied- the key to this dish is the orange cups.  They add such a nice hint of orange flavor.  Plus, when you fill them with the sweet potatoes, they almost look like little oranges!


These sweet potatoes always appear at Thanksgiving and Christmas with my Ham and Green Bean Casserole.  Sometimes, if I am feeling confident during the week, I will make my lazy version*.

You Will Need:
Sweet potatoes- 1/2 a potato per person + leftovers
Navel Oranges- 1/2 per person + leftovers (you are aiming for 1 serving of potatoes per orange half)
2 TBSP butter
2 TBSP - 1/4 cup honey (optional)
1/4 cup of water
Cinnamon
Cloves
Nutmeg
Electric Skillet (what my mom always used, so its what I use.)
Baking dish
Chopped Pecans *optional
Mini Marshmallows *optional

Directions:
Bake, boil or microwave your sweet potatoes until they are soft.  I baked mine at 425 degrees for 1 hour.  Let the potatoes cool, and then peel and dice into uniform cubes.  Melt the butter in your electric skillet over the warm setting.  Place the potatoes in the electric skillet and drizzle the honey (start with a little, you can add more later) over the top.  Sprinkle with Cinnamon, Cloves and Nutmeg.  I never measure these spices, I just follow my mother's rule of "sprinkle it until you smell it".  Gently toss the potatoes so the honey and spices are evenly distributed.  If the pan looks dry, add a small splash of water and turn the dial on the electric skillet to 250 degrees. Cook for ten minutes, then taste the potatoes.  You may want to add more honey or a pinch of salt.  I usually find a pinch of salt will make everything seem sweeter without a lot more honey or sugar.  Check again to see if you need to add water.  You should have a small amount of liquid in the bottom of the pan.  Increase the heat to 300 degrees.  We want the potatoes to caramelize and get a slight crust.  While your potatoes are crusting, slice each orange in half (one side will have the stem, the other will have the navel), scoop out the flesh and place the halves in a baking dish.  Check the potatoes to see if they have developed a crust.  If they have, turn the skillet off and distribute the potatoes in the orange cups.

If you are making the sweet potatoes in advance, like I do, cover the pan with aluminum foil and freeze until Holiday Eve.  If not, top with marshmallows and chopped pecans and place under the broiler for a few minutes until brown and bubbly.

Yes, we scooped out perfectly good oranges and used the skins for decoration- but now you have a reason to eat the fruit you keep saying you should eat.  You could also freeze the orange sections to use in smoothies!  Or just make some Sangria...

*Occasionally, I will get lazy and make these sweet potatoes without the orange cups.  They are almost as good, but they are much easier.  Swap the water for orange juice and add a sprinkling of orange zest.  You will also need to watch the pan to make sure it doesn't burn.  Keep a little water near by to add to the pan if things look like they are getting to sticky.  Depending on your desired sweetness, you may want to add the honey at the end after tasting.

Saturday, December 15, 2012

That Chocolate Thing That Willie Made- aka Chocolate Truffle Loaf with Raspberry Sauce

Growing up, I don't remember my maternal grandmother (Willie) cooking a lot.  That might be because my uncle is a chef, or maybe she did and I don't remember it.  I do remember her watching football, knitting or playing solitaire...so I think maybe she just didn't cook a lot.  However, I do remember a few particular dishes that only she made:

Macaroni and Cheese (the real kind)
Cheese on toast
Giblet Gravy
Something containing pearl onions that my dad liked at the holidays
Standing Rib Roast
Stuffing
Some sort of salad at every meal,
and...That Chocolate Thing- also known as Chocolate Truffle Loaf with Raspberry Sauce.

My once cousin claimed you cant make macaroni and cheese like hers unless you have the cup with the red lid that she used to shake up the flour and milk- but I think mine comes pretty close.  Cheese on toast as been a breakfast staple as long as I can remember.  I am sure if anyone other than her ate the giblets I could figure out how to make giblet gravy...and other than onions, I don't know what is in that onion dish.  But the Chocolate Thing- that I just found her recipe for.

Once we convinced my grandparents they needed a computer and internet, my grandmother took to it pretty well.  I would send her papers to proof read, she liked to get emails from my cousin when he was deployed, and then there online shopping.  I think she liked the convenience of it...especially at Christmas.  One year, I came home from work to find package on my doorstep from Pet Smart.  I immediately called her to make sure I didn't need to poke holes in the box.  At first I thought she had shipped us a kitten- turns out it a kitty safe de-icer for my dad.

A few years before she passed, I asked her to send me the recipe for The Chocolate Thing.  I had already mastered her stuffing and I was starting to branch out a little more when it came to cooking.  Having once told me I would never meet a man and get married if I didn't cook (she may have been right about that), she was happy to send it.  She sat down at her computer, typed it up (there was no link to just direct me to)- either from memory or the scrap of paper torn out of a magazine, and sent it on its way.  I have only made it a handful of times.  There are more steps and required concentration than I usually like in a recipe, but it is so worth it.

You Will Need:
2 cups heavy cream- divided
3 egg yolks, slightly beaten
2 pkgs (8 oz each) Baker's Semi-Sweet Chocolate
1/2 cup Karo syrup- light or dark
1/2 cup margarine or butter
1/4 cup confectioners sugar
1 tsp vanilla
Raspberry Sauce (below)

Line 8 1/2 x 4 1/2 x 2 1/2 loaf pan with plastic wrap. Mix 1/2 cup cream with egg yolks. In 3 qt.

saucepan stir chocolate, corn syrup, and margarine over medium heat until melted. Add egg mixture. Stirring constantly, cook 3 minutes. Cool to room temperature.

Microwave instructions: In 3 qt. microwavable bowl mix chocolate, corn syrup, and margarine. Microwave on High, stirring twice 2 to 2 1/2 minutes or until melted. Stir in egg mixture. Microwave, stirring twice, 3 minutes.


Beat remaining cream, sugar, and vanilla until soft peaks form. Fold into chocolate until no streaks remain. Pour into pan. Refrigerate overnight or chill in freezer 3 hours. Slice and serve with sauce. Serves 12 


Raspberry Sauce: 
In blender puree 1 pkg. (10 oz.) frozen raspberries, thawed. Strain. Stir in 1/3 KARO corn syrup. Serve over slices of truffle.

I remember these being pretty big servings, so you could probably stretch the desert to more than 12 people if you are serving a larger meal or as part of a party.  However, this desert must be kept cold, so I don't recommend serving it from a buffet. 

Monday, December 10, 2012

Gluten Free Baked Donuts- 365 Recipe Challenge

I love Pinterest.  You might say it borders on Pinsanity.  Either way, Pinterest led me to this awesome recipe for Baked Donuts.  Of course, I needed to modify it for gluten free purposes, but it was super easy- and fast.  I think it is going to be great for Christmas morning.  We usually have a light treat (donut, coffee, etc) before we open stockings and while we wait for everyone to gather.  Then, between stockings and presents we have breakfast.  I like to make Christmas morning last as long as possible.  I probably wont make these the morning of, since I really don't want to mess up my kitchen that early, but I will definitely make them the night before.  As someone who is used to having to defrost ALL of my gluten free baked items, it is no big deal to pop something briefly in the microwave (although they are just as delicious cold!). I originally thought I would just freeze most of the test batch, but after the look on my husbands face, I don't think we will have leftovers.  Since the hubs and I are counting calories as well, I figured out the nutritional information as well.  I am sad to say these are no better for you than a traditional donut hole (about 80 calories each)...unless you eat them plain.  Oh well, at least they are preservative free.

Cinnamon Sugar and Powdered Sugar.  Baby Donut Sweetness!

You Will Need:
1 1/2 cups (leveled) Pamela's Artisan Flour (for a non gluten free version, use regular flour)
1/2 cup granulated sugar + more for cinnamon sugar dusting
2 tsp baking powder (if you substitute a gluten free baking mix like Bisquick or Bob's Red Mill, you probably wont need this, but I have not tested it. You will need it if you use Pamela's Baking Mix.)
1/4 tsp  salt
1 egg
1/2 cup milk (I used 1%)
1/4 melted butter (make sure it cools to room temp so you don't scramble the egg) + more for dusting
1 tsp vanilla
cinnamon (optional)
powdered sugar (optional)

Directions:
Mix the flour, sugar, baking powder and salt in a bowl.  In a large measuring cup, mix the milk, egg, butter and vanilla and then add the wet to the dry ingredients.  Stir until incorporated.  The batter should be pretty sticky.  If it seems dry add a little more milk or water.  Mine did not need any more liquid.  Really, we are making tiny breakfast cupcakes, so it should look similar (although slightly less pourable) to cake batter. Scoop into greased, unlined mini muffin tins.  If you line the tins you wont get the golden brown outside- it will be more muffin like.  If you must line your muffin tin, make sure you unwrap them before storing leftovers.  Gluten free muffins tend to "sweat".  Bake at 350 for 8-10 minutes.  My oven took the full 10 minutes.  Additionally, the instructions on the bag of Artisan flour recommend placing items in the upper third of the oven for best browning.  Mine were still pretty pale, but they were cooked through.

Don't blonds have more fun?  They are certainly delicious!
To dust, dip the top of the muffin in the melted butter and dust with your desired toppings.  I mixed 2 parts sugar to 1 part cinnamon to make cinnamon sugar.  Regular donuts are tossed in the sugar right after frying so the grease acts as a binding agent.  Since we aren't frying them the melted butter is our binding agent.  You can also follow the instructions in the link for her glaze- but we aren't glaze people in our house.  You could also frost these with your favorite frosting or dip them in melted chocolate.  Mmmm...chocolate.

I hope all the gluten free people out there enjoy an chance to eat donuts!  I have never wanted a donut pan or a deep fryer before, but now I find myself thinking I need one.  :)

That's What's for Breakfast!

Sunday, December 9, 2012

Wassail Tea

Here is a quick and easy recipe for a warm cozy holiday beverage.  Wassail Tea.  It makes a lot, so if you are planning on serving it out of a standard size crock pot at your next holiday party, know that you will need to halve the recipe.  Also, you will need a large pot to hold all the ingredients.  7 quarts = 28 cups: I don't own a pot that big, so I always halve the recipe.  The full recipe will serve about 20 people.  However, you can refrigerate the leftovers and just heat up a single serving at a time.

You Will Need:
7 quarts water
2 1/4 cups raw, local honey
1 cup lemon juice
1 TBSP whole cloves
4 sticks cinnamon
10 tea bags (like you'd use for iced tea)
2 cups unsweetened cranberry juice*

*I think this tea is pretty sweet.  Not make your teeth ache sweet, but pretty darn sweet.  If you need it to be sweeter, add more honey to taste.  If you can not find unsweetened cranberry juice, cut the honey in half to start, adding more if necessary

Directions:
Bring the water, honey, lemon juice to a boil along with the cloves and cinnamon sticks.  Once it boils, turn off the heat, and add the tea bags and juice.  Steep for 5-15 minutes, depending on how strong you want the tea flavor to be.  I am not a big fan of tea, so I usually pull the bags out at the 5 minute mark.  If you plan to leave the bags in longer than 5 minutes, I would also add 1/4 tsp of baking soda to the boiling water when you add the tea bags (it will help cut the bitter taste- works in iced tea too!).

Enjoy!

Nutritional Information as calculated by My Fitness Pal

Sunday, December 2, 2012

Grill Roasted Turkey- 365 Recipe Challenge


I know, I know.  You just finished off the last of your Thanksgiving Turkey and you haven't even begun to start thinking about your Christmas Turkey.  Well, I am here to tell you- you should be!  Christmas is only 23 days away!  For those of you already feeling inadequate, I have had my Christmas Eve and Christmas Day menu planned since Halloween!  Why you might ask?  Because that is what I do.  I start thinking about Halloween at my birthday, and I am in full holiday mode before the last jack-o-lantern has been smashed in the street by those annoying delinquent teenagers the next block over (which is also why we have a fake pumpkin now).  

Maybe you don't feel up to Christmas just yet?  Don't feel overwhelmed. Just make a plan, get your shopping done as early as possible and don't forget to delegate. I have embraced my Obsessive and Excessive holiday planning this year.  I am going to celebrate the holidays to their maximum capacity, but I am not going to make myself crazy.  Last week I sent a schedule to everyone coming for Christmas.  A little much? I don't think so.  Now everyone knows what the plan is and what needs to happen.  I like plans.  I like knowing what to bring, where to go, and when to be there.  For my husbands sake, I even listed naps (his favorite) and grocery trips (his least favorite).  

When it comes to the food, it is almost more important to plan ahead than at Thanksgiving.  With all the present opening and family visiting, who wants to be stuck in the kitchen? You have to make as many things as you can in advance.  You also need an action plan so you don't spend two days cooking by yourself and completely miss the holidays (yep, did that last year).  Enter, Grill Roasted Turkey.  Let the men be men and watch the Turkey this year.  Even better if you can send them all to the backyard with a 6 pack so you don't have to watch sports or worse, The History Channel.  They don't really have to do much, just stand around the grill, and occasionally baste the bird- but they will be out of your hair, and not napping while you do all the work.  You will have to prep the bird, and provide them with instructions, but the heavy lifting will be up to them.

You Will Need:
1 turkey, 1.5 pounds per person- washed and cavity searched
1 cup salt
1 cup sugar (whatever kind you have extra of)
1 TBSP black peppercorns
1 pack fresh holiday herbs (if you cant find them, just use some poultry seasoning.)
1 stick softened butter (you can also substitute 1/2 cup olive oil)
1 TBSP Poultry Seasoning
1 TBSP Cajun Seasoning (or salt and pepper)
Bits and pieces of carrot/onion/celery/lemon- whatever is left over from other recipes
2 heavy duty disposable aluminum pans
Aluminum Foil
Beach Towel
Turkey Thermometer (not the pop up timer that comes in the bird!)
Turkey baster


For the Turkey Brine (Christmas Eve): 
24 hours before you plan on cooking, boil a large pot of water with 1 cup salt, 1 cup sugar (white, brown, both- whatever), 1 tbsp black peppercorns.  Once the sugar and salt dissolve, remove from heat and add in 1/2 pack of holiday herbs.  Allow the water to cool (add ice, cold water, etc) Place your clean turkey (neck, giblets removed- do that cavity search!) in a cooler or 5 gallon bucket.  Pour the  COOL water mixture over the turkey.  Make sure your water is not hot or you will cook the turkey! Add enough water and ice so the turkey is completely submerged.  Place bags of ice in the water to keep the turkey cold.  Flip the turkey over at the 12 hour mark.  Check the ice frequently, swapping out the melted ice bags for fresh ice as needed...just don't let the water freeze.

To cook the Turkey (Christmas Day):
Remove the turkey from the brine and rinse well.  Don't forget to rinse, it will be too salty otherwise.  Sprinkle the cavity with salt and pepper.  Place bits of onion, celery, the rest of the holiday herbs, carrots, lemon ( whatever makes you happy) inside.  Mix the softened butter, poultry seasoning, and cajun seasoning together.  Dry the turkey really well, and rub the butter mixture all over the skin.  Place the turkey in the disposable roasting pans (use both so they don't collapse), on top of more veggies (the same that you shoved inside). Cover with aluminum foil an cook 15 minutes per pound.  After you reach the 2 hour mark, baste every 15  minutes  (leave the foil off at this point).  Keep the grill between 350-450.  Remove the Turkey from the grill with the internal temp is between 160-165 (the timer that comes with the Turkey will not pop).  Replace the foil, cover with beach towels, and allow to rest 20 min-1 hour.  

DO NOT CARVE THE TURKEY UNTIL YOU ARE READY TO EAT.  WHEN EVERYTHING ELSE IS DONE, AND SOMEONE IS MAKING GRAVY, THEN YOU MAY CARVE THE TURKEY.   Seriously, the turkey needs time to rest.  The beach towels will keep it hot and carving it too soon will only make it dry.  

That's What's for Christmas Dinner!

Friday, November 30, 2012

Planning Ahead With Freezer Meals

A friend of mine is going on a well deserved vacation (without the kids and husband) and, since she is a great wife and mother, she asked me for a few meals she could make in advance so the family doesn't starve or end up eating take out all week.  I have posted a few of my go-to recipes below. However, with a few modifications, a lot of your favorite meals can be freezer friendly.  We eat something out of our freezer at least once a week.  If the ingredients for a recipe are on sale, I make a double batch and freeze half of it for later use.  Add a salad, fruit or bread and your family probably wont realize it came out of the freezer.  Freezer night can also be desert night.  You saved time on dinner, why not spend the extra time with your kids and a sweet treat! Here are some of my other tips:

1.  Write the contents on the outside you don't have to play the guessing game later on.  If someone other than yourself will be reheating, cooking instructions are also helpful.  

2.  Unless you are sure the entire dish will be eaten within a day or two of defrosting, portion your meals into serving sizes.  You have already stretched the expiration date by freezing it, don't expect it to last an additional week in your fridge.  Also, it makes it a lot easier to take meals to work for lunch if you can let one serving defrost in your lunch box and then pop it in the microwave when it is time to eat (assuming it is has be cooked all the way through). 

3.  Freezer meals are not about presentation.  That is why casseroles, soups, chilies and stews work best.  Veggies may get a little mushy and other textures may change when they are defrosted.  Instead of having a biology lesson, just trust me on this.  Anything plant based will not look freshly picked, so don't fight it.  It is still just as good. Boxed meals from the store have preservatives and special equipment like flash freezers to make them look "normal".  Just freeze your meals right away (not after a week of hanging out in your fridge) and they will be just as good- even if they aren't beautiful.  However...

4.  Whenever possible, try not to freeze starches.  If you have the extra time to make fresh pasta, rice or bake a potato (even better if your microwave has a baked potato button) your meal will seem less "leftover".  

5.  If a recipe calls for eggs to be poured over and then baked (like in my breakfast casserole) save these ingredients until after you thaw them.  Also, I like to use egg beaters instead because they last longer and they are easier to measure- which makes things easier if you are taking the food to someone or just leaving instructions with your spouse. 

6.  If you make to much dinner one night, make your own hungry man meals.  Put your main dish, sides, etc in a microwave safe container, freeze and let your own hungry man feed himself.  

7.  I will eat the same thing every day for a month and not get tired of it.  My husband wont.  Whenever possible, try to re-purpose your meals.  If you make a pork loin or chicken; shred the meat, freeze the leftovers ( ideally with  a sauce- BBQ, salsa, enchilada, tomato, etc) and call it tacos/nachos/pizza/whatever the next time you serve it.  Again fresh toppings/ingredients make it seem new. 

8. Pasta sauces are another great freezer option.  Make it a meat sauce, hide some veggies (grated in carrots/broccoli, etc) and you have a complete meal if you can boil pasta.  They are also really cheap to make in bulk, and if you package them in single servings family members can choose their own sauce. 

A few recipes that can easily be made freezer ready:

Hillbilly Shepard's Pie:
Assemble as directed.  Freeze instead of baking.  Thaw in the refrigerator over night and bake according to directions.

Breakfast Casserole:
Prepare in advance except for the eggs, milk and cheese.  Refrigerate over night or freeze.  Bring to room temperature, add the eggs, milk and cheese.  Cook as directed. 
*note- this recipe calls for 3 eggs + 1/4 cup of milk.  You can substitute 3/4 cup of egg beaters + 1/4 cup milk to make things easier on someone who doesn't cook a lot.  *

Cincinnati Chili:
Prepare chili as directed and freeze in smaller batches or individual portions.  Thaw, re-heat in the microwave and serve over freshly cooked pasta or roasted spaghetti squash.  Pasta can be cooked in advance and refrigerated.  To re-heat, place the pasta in a colander and set in a bowl of hot water until warm- just like they do in resturants. 

Chicken and Chickpea Stew:
Freeze in smaller portions.  Thaw and reheat in the microwave. 

Taco Casserole:
Assemble according to directions.  Freeze instead of baking.  Thaw in the refrigerator over night and bake according to directions. 

I hope these help!  That's what's for dinner...next month. 

Sunday, November 25, 2012

Product Review: Pamela's Gluten Free Sugar Cookies

Today I have a product review for you.  Last time my husband and I went to our favorite grocery store, Sprouts, they were doing their Gluten Free Jubilee.  This is always super exciting, because it means the gluten free food I have to buy is on sale, so I can afford to buy a few extra treats (or just stock pile thinks like bread).  Baking mixes are one of the items we usually stock up on because we can keep them in the freezer and pull them out when we need them.  We got really excited to see that the Pamela's brand of gluten free products had come out with a lot of new mixes.  We bought a bunch of them, but today I am going to review the Pamela's Gluten Free Sugar Cookie Mix.

The plate matches my super cute heating pad! 
Sugar cookies have been one of the products that has been surprisingly hard to find gluten free.  Around the holidays I would kill for a tube of gluten free sugar cookies to slice and bake.  Alas, the only mixes I have ever found involved a lot of ingredients, steps, or both.  This mix only requires butter and 1 egg.  It also included instructions to make your own slice and bake cookies.  Also, I can not wait to make fruit pizza with it!

I let the butter soften on the counter.  I thought it was pretty soft, but in retrospect it could have been softer.  It didn't quite mix as well as it should have- so make sure your butter is really soft.  Or...set your bowl on a heating pad like I did and keep on beating.  After I had added all the ingredients I mixed...and mixed...and mixed waiting for the dough to come together like the package said.  Maybe my butter still wasn't soft enough, but my dough never came together.  However, having made pie crust last week, I hoped the wet sand looking dough I now had in the bowl might turn into dough if I rolled it out.  I reached in, grabbed a handful, and made a little ball.  Success!  The dough held together.

Because I am a little lazy, I decided to roll all the cookies into little balls and then press them out.  I didn't have any parchment or wax paper to roll out my cookies, and this just seemed a whole lot easier. I also ended up with 24 cookies instead of the 17 listed on the package.  I dipped some of the cookies in cinnamon/sugar, some were left plain, and the rest got sprinkled with Andes mints.

The package said to bake the cookies at 350 for 8-10 minutes.  At the 8 minute mark, my cookies were still really soft and mushy.  So they went for 2 minutes more...and the 2 minutes after that.  Big mistake.  The first batch came out pretty dry.  They never really browned around the edges, but upon inspection the bottoms were a nice golden brown.  The plain cookies taste a lot like shortbread instead of sugar cookies.  For the second batch, I cooked the cookies for exactly 8 minutes, and then took them out of the oven.  The were definitely still really soft, but after cooling for a few minutes they were perfect!.  However, my cookies were a lot thicker than if I had rolled them out so I suspect 8 minutes would be too long for thinner cookies.

So, would I buy this mix again?  Definitely.  Do they taste like real sugar cookies?  Yes- if you don't over cook them.  I hope they work out for you!

Monday, November 19, 2012

Pie Crust- 365 Recipe Challenge

For today's recipe, I had to call in some back up.  One of my favorite Thanksgiving foods, it left over turkey pot pies.  However, this requires pie crust and gluten free pie crust can be hard to come by.  My friend Lauren is the Pie Queen, and her mom is attempting to be better about being gluten free so I invited her over for some gluten free pie crust making.  I bought some new gluten free flour, and she brought her non gluten free recipe and we started experimenting.  Pamela's Gluten Free Artisan Flour is supposedly pretty darn close to real flour so we hoped we would be able to use a regular recipe.  There is a pie crust recipe on the bag, but there were extra ingredients that weren't in Lauren's recipe (like sugar and butter), so we stuck with hers and hoped for the best.

You Will Need:
1 cup flour (we used Pamela's Gluten Free Artisan Flour)
1/3 cup + 1 Tbsp shortening (mmm...Crisco- don't freak out, there isn't that much per serving)
1/2 tsp salt
Very cold water (we used approximately 10 Tbsp for 4 crusts, so about 3 Tbsp.)
pastry cutter or two butter knives
rolling pin
pie plate

Directions:
In a large bowl, mix together the flour and salt.  Drop in the shortening, and cut it into the flour with either a pastry cutter or two butter knives.  Lauren uses a butter knives, but since I have a fancy pastry cutter, I insisted on using it.  Stop once the flour mixture resembles chunky sand (isn't that a pretty mental image?).  Start mixing in the cold water, a little at a time.  

Think really old play dough.  It is a lot drier than what you think dough should look and feel like.
The mixture will still seem dry, but when you can squeeze it in your hand and it holds it's shape, it is done. Form into a mound, and turn it out onto a lightly floured counter or pastry mat, and roll in to a pie crust shape- a little bigger than your pie plate.

Kept have to stop rolling and fix the cracks.  All hope was lost  when I tried to put it in the pie plate.
This was when we realized, the gluten free flour wasn't exactly like regular flour.  If you are using gluten free flour, I recommend skipping the rolling step and just dump it straight into the pie plate.  

Faking a perfectly rolled pie crust.

Without the gluten, it tends to fall apart, so just press it around in the pan until you have a pie crust. Make the edges pretty, and fill with your favorite pie filling.

Pumpkin...yum. 

If you quadrupled the recipe like I did, just place the dough balls individually in a plastic bag and freeze until you are ready to use them.

What did we learn:
The gluten free flour is not exactly like real flour. It tasted good, but the crust seemed thinner than regular pie crust.  I suspect this is why they had the extra ingredients- to stretch it. I don't know the chemistry behind this, so I can't say for sure.  It doesn't bother me, but if you are trying to fool other people, I would either add the extra stuff on the back of the bag, or just make extra crust.  It was just as easy to make 4 crusts as it was one, so I would just divide the 4th crust equally among the other 3 to end up with a little more crust.  As usual, it is a texture issue with gluten free, but this was pretty darn close.   Also, their web site suggests adding additional water to some recipes- just be careful it doesn't get sticky.  Once cooked it wasn't crumbly, it cut beautifully, held up on the plate and most of all, it actually browned.

Even if you aren't gluten free, I recommend this pie crust recipe.  It was really easy to make.  Every other time I have tried to make crust I have over worked it or made it really complicated buy using the food processor.  All you really need is a bowl, and two butter knives (or pastry cutter).

Happy Holidays!

Thursday, November 15, 2012

Crock Pot Macaroni & Cheese- 3 recipes to choose from

Recently I got a request for Crock Pot Macaroni and Cheese.  To be honest, despite my love of the crock pot and my almost obsessive love of macaroni and cheese, I rarely make macaroni and cheese in the crock pot.  Therefor, I consulted a few of my cookbooks to come up with a good recipe.  One recipe I found I had tried before. The other was written by the crock pot people.  Having not tried the crock pot recipe, I can't honestly say what it will taste like.  However, it looks like a hybrid of the other recipe and what I would throw together in the crock pot and call it macaroni (yep, that is a Yankee Doodle reference :).  So, I am going to post the 2 cook book recipes and my recipe.  Since everyone's opinion of macaroni and cheese varies, I recommend giving these a test run before you try them on a large crowd.

My Version aka "just toss some stuff in the crock pot and call it mac and cheese"
In case you were wondering, it is absolutely possible to cook raw (uncooked pasta) in a crock pot.  Since I hate having to clean an extra pot, I like dumping my pasta, sauce and whatever veggies or meat I have into a crock pot and calling it dinner.  The pasta will absorb some of the liquid, so you end up with more of a casserole than a pasta dish with sauce.
This recipe is almost identical to oven baked macaroni and cheese.  In this case, the crock pot is the oven. I have taken my recipe for cheese sauce (no one says you cant use less milk/flour/butter and pepper jack cheese instead and call it queso) and used it as I would tomato sauce in a crock pot lasagna or baked ziti.  If you don't have a crock pot, just pour it into a baking dish and bake it in a 425 degree oven for 20-30 minutes until brown and bubbly.

You Will Need:
1 box of pasta (Ancient Harvest Quinoa & Corn or Tinkyada are some good Gluten Free options)
4 Tbsp butter (whatever you have.  Just make sure you taste the sauce before adding more salt)
3 Tbsp flour (Bob's Red Mill for gluten free)
milk, 2-4 cups (whatever you have.  As always, I use skim.  The richer the milk, the richer the sauce)
2 cups shredded cheese, plus extra to sprinkle on top (I like a mixture of cheese, but cheddar works)
salt and pepper to taste.
crock pot
cooking spray

Directions:
Over medium heat, melt the butter in a large skillet.  Whisk in the flour until you have the consistency of thin peanut butter.  Slowly add the milk, a little at a time.  Each time you add milk, be sure to whisk out the lumps before adding more milk.  If your milk is not thickening, turn up the heat a little bit.  Once you have the constancy of thin (but not runny) gravy, turn the stove down to a simmer and add your cheese.  Like the milk, add a little at a time making sure the cheese melts before adding more.  Whisk to combine.  Add salt and pepper to taste.  Mix in the uncooked pasta and pour into the crock pot (that you sprayed well with cooking spray).  Cover with the remaining cheese and cook on low for 3 hours.

My Great Aunt's version, taken from the Best of Both Worlds Cookbook
I have tested this recipe and it is delicious.  However, it does contain eggs so the texture ends up being more casserole like and it may not beed good for those with egg allergies.  Still, it is very similar to the usual oven baked macaroni and cheese- but I don't recommend it for gluten free pasta.  If you are using gluten free pasta, you may loose some of the pasta's texture since gluten free pasta doesn't stand up well to over cooking.  I should also point out, when ever you make a dish with gluten free pasta that needs to be cooked twice (boiled, then baked in the oven), you should subtract 2 minutes from the boil time.  It will finish cooking in the oven.

You Will Need:
8 oz macaroni (for gluten free, I highly recommend Tinkyada for this recipe.  It holds up the best. )
1 can evaporated milk (evaporated milk, is regular milk with less liquid.  NOT sweetened condensed)
1 tsp salt
2 eggs, beaten
16 oz grated sharp cheddar cheese
1 1/2 cups milk
4 oz melted butter

Directions:
Cook macaroni as directed on package.  Combine all ingredients in the crock pot.  Cook on low 2-3 hours.

I would recommend letting the pasta cool a bit before combining the ingredients.  Crock pots work the best when all of the ingredients are the same temperature.  Also, hot pasta + eggs = scrambled eggs.

Rival Crock Pot's Recipe
I have never tried this recipe, but I assume the crock pot people have.  It has a cooking time of 2-3 hours on HIGH, which seems weird to me.  If you try it, let me know how it works.

You Will Need:
6 cups cooked macaroni
2 Tbsp butter
4 cups evaporated milk
6 cups cheddar cheese, shredded
2 tsp salt
1/2 tsp pepper

Directions:
In a large mixing bowl, toss macaroni with butter (I'm assuming the butter should be melted, but it doesn't specify).  Stir in evaporated milk, cheese, salt and pepper.  Place in the crock pot (I would just mix it all in the crock pot instead of dirtying that other bowl), cover and cook on high for 2-3 hours.

I hope one of these recipes works out for you this holiday season.  When it comes to pasta in the crock pot, it really comes down to a texture issue.  Please feel free to comment with any questions or suggestions.

Wednesday, November 14, 2012

Green Smoothie- Bonus Holiday Recipe!

The Green Smoothie.  The first time someone suggested I drink something green, I thought they were nuts.  However, as I have come to accept and even embrace, green smoothies are a great food to add into your diet.  They are full of healthy ingredients and actually quite delicious.  Most importantly, you can't taste "the green".  They are a great recovery food after a workout or as a way to sneak in a little more nutrition.  As we approach the holidays, the almost inevitable weight gain and, admit it, the hangovers; the green smoothie will be my secret weapon to bounce back in the new year.  
Make it special, put it in a fancy glass.

You will find a lot of different green smoothie recipes on the internet.  Some of them have protein, some of them don't.  The green ingredient changes person to person.  Some people use ice, others don't.  Once you jump on the green smoothie bandwagon, so you will find a recipe you like.  I like my green smoothie to be as close to a chocolate shake as possible. I do not use ice in my green smoothies because I don't like the texture.  Instead, whenever possible, I use frozen fruit and frozen spinach.

You Will Need:
2 cups frozen spinach (you can use fresh baby spinach too, just pack as much as possible in the blender)
1 frozen banana
1 scoop Chocolate Shakeology 
1 cup water (if you need the calories, substitute your milk of choice)
*scant amount of peppermint extract
blender

*If you want a "Shamrock Shake" add a VERY SMALL amount of peppermint extract.  A little goes a long way.  I recommend adding the peppermint if you are trying to fool the kids.  Just tell them it is mint chocolate chip. 

Directions:
Starting with the water, place all of the ingredients in a blender.  Blend until smooth.  If you are using a Vitamix, you probably wont need any more water.  Other blenders might require adding a little water at a time to get things going.  Makes 1 meal or 2 snacks.  

Variations:
Spinach + 1/2 banana + 1/2 cup strawberries+ Shakeology+ 1 cup water
Spinach + 1/2 banana + 1/2 cup cherries + Shakeology + 1 cup water
Spinach + banana + 1/4 cup rolled oats, ground + chocolate B'NPB+ 1 cup cold coffee+ Shakeology


Monday, November 12, 2012

Crock Pot Mashed Potatoes- 365 Recipe Challenge

Thanksgiving is almost here!  Let the holiday eating begin.  Of course, with all of the holiday eating comes holiday cooking. Today's recipe for the 365 Recipe Challenge is perfect for your holiday meal AND it will save you time and valuable stove top cooking space.  I originally found this recipe for Crock Pot Mashed Potatoes on Pinterest, but I have modified it to serve less people and to be lower in calories.  I do not want to fall victim to the holiday weight gain, but even if you don't care about holiday poundage, I think you will really like this recipe.  This also works really well for smaller holiday parties, Sunday suppers or for people with small kitchens (i.e.: very little cooking space). My recipe will serve 6, but my Aunt recently doubled the recipe for her Thanksgiving test run and reported it worked out fantastically.

You Will Need:
3 large russet/baking potatoes (or equivalent of baby red potatoes)
1/2 cup water
1/2 stick unsalted butter
*1/4 cup grated Manchego cheese (I buy the small "leftover" chunks at Whole Foods, usually about $2)
*minced garlic (1-2 cloves depending on how much you like garlic.  You can also use roasted garlic)
2-4 tsp salt and pepper blend
1/2-1 cup of milk
Large crock pot, ideally with a warm setting
cooking spray
vegetable peeler

*optional ingredients.  You can also add in chives and sour cream once the potatoes are done cooking.  My cousin, the Mashed Potato Queen, would give me dirty looks for adding things to my potatoes, so I feel the need to clarify- you don't actually need anything but water, potatoes, salt, pepper, milk and butter.  :)

Directions:
Peel your potatoes and dice into 1 inch cubes (eyeball it, just make sure they are all about the same size).  If you are using baby red potatoes you can leave the skin on and jut cut them in half - but try to make sure they are the same size so they cook evenly.  Spray your crock pot with the cooking spray and place the potatoes inside. Pour the water over the potatoes.

Kosher salt and black pepper (70/30) mixed together to make my own season salt

Sprinkle the potatoes with the salt and pepper. I would start with 2 tsp, and add the rest when you are mashing them- especially if you are adding the cheese. Cheese has salt! Grate the cheese (or finely chop if your grater is dirty or you don't want to wash another cooking utensil) and sprinkle over the top of the potatoes.  Cut the butter into chunks and place on top of the potatoes.  Lastly, distribute the garlic over the potatoes.  Cook on high 3 hours, stirring occasonally to prevent the potatoes on the bottom and edges from browning.
Just toss it all in there, it doesn't have to be pretty.
Note, my crock pot is only half full.  A double recipe will fill the crock pot.  

If you double the recipe you will need to cook the potatoes for 5 hours.  Alternately, you can cook them on low for 6-10 hours.  The first time I made this, I started checking the potatoes at the 2 hours mark.  The potatoes are done when you can pierce them with a fork, which was exactly 3 hours for me with a half full crock pot.  Once they are done, just turn the crock pot to warm until you are ready to mash.

When you are ready to mash, do not drain the water.  The starchy cooking water is what helps keep the potatoes creamy without a lot of added milk and butter.  I used a potato masher for a "rustic" texture, but you can also use a hand mixer for whipped potatoes.  Add a little bit of milk at a time until you reach the consistency you desire.  I used skim milk and I did not add any more butter.  I did end up adding about 2 tsp more of the salt and pepper blend. Cover the potatoes and keep the crock pot on warm until it is time to eat.  Makes 6 generous portions.

This is one serving on a lunch size plate.
Please excuse the black box hiding next week's recipe!

I also think this would work great with sweet potatoes.  You could serve a little brown sugar or cinnamon on the side or after you mash them, sprinkle some mini marshmallows over the top and cook for 30 minutes longer until they melt.

Nutritional Information per serving (for those who count calories over the holidays):
Calories: 188
Carbs: 28
Fat: 8 (just imagine what it would be with more butter and regular milk!)
Protein: 3
Fiber: 2 (would be higher with the skins on)
Sugar: 1

That's what's for our holiday dinner!

Monday, November 5, 2012

Holiday Green Bean Casserole


My mom loves Green Bean Casserole.  Unfortunately (or fortunately for our waistlines), we can't have it because it isn't gluten free.  Enter, Gluten Free Green Bean Casserole!  I have modified this recipe from one I found on Food Network to suit our tastes and provided conversions below to make it 21 Day Fix friendly.  There is no cream of anything soup or french fried onions in this recipe, but it is still really delicious. If you aren't worried about making it gluten free, you can substitute regular flour and regular corn flakes, but give your Glutenites (as my father calls us) a little love and make it gluten free. I promise you wont miss the gluten.   


We make this recipe every holiday, along with Ham and Orange Scented Sweet Potatoes.  We might occasionally add Macaroni and Cheese, but we aren't very adventurous and pretty stuck in our traditions around the holidays.  

You Will Need:

Green beans, about a pound cut into bite size pieces
2 tablespoons butter (extra virgin Olive oil for 21DF)

1/2 a small onion (or whatever you have left over from another dish- you don't need a lot)
1/2 a box fresh button mushrooms, diced
2 tablespoons Gluten Free Flour 

1 cup light sour cream (or plain Greek Yogurt for 21DF)
Salt and Pepper
1 1/2 cups Nature's Path Gluten Free Corn Flakes (I like Mesa Sunrise or Fruit Juice Sweetened)
1 cup Shredded cheese (Mozzarella or Monterey Jack both work well)
Cooking spray
Rectangular Casserole dish
20 minutes of oven time  


Directions:

Steam (I use steamer bags) your green beans just until tender.  Rinse with ice water to preserve the color and stop the cooking process.  Drain the beans and set aside.
Melt the butter/oil in a large skillet.  Cook the onions until translucent. Add the mushrooms and cook until softened.  Season with salt and pepper.  Add the flour 1 tablespoon at a time and stir to combine.  Add enough flour to absorb the butter/oil, but not so much that the pan is dry.  Cook about a minute, just until the flour starts to develop light color. Add the sour cream/yogurt and mix well. Simmer a few minutes over low heat until the flavors combine.  Taste, and add more salt and pepper if needed.  

Spread the green beans over the bottom of a well oiled rectangular casserole dish.  Pour the mushroom/onion sauce over the beans and top with the shredded cheese. Crush the corn flakes into large crumbs and sprinkle over the top of the casserole.  (At this point, I usually set my casserole to the side and prep other holiday food.)  
30 minutes before you want to eat, preheat the oven  to 400 degrees.  Gently spray the top of the corn flakes with cooking spray (you can toss the corn flakes with butter before adding to the casserole, but I like to avoid the extra calories).  Bake in the preheated 400 degree F oven, until light golden brown and bubbly, approximately 20 minutes. Remove from the oven and serve. Serves 8.  

That's what we are having for our holiday dinner!  Happy Holidays!

Tuesday, October 30, 2012

Crock Pot Oatmeal

Breakfast is my favorite meal of the day, but I am not good about waking up early enough to make it before work.  This recipe is a great option to feed a crowd, or just to make in advance on a Sunday night for the rest of the week.  The protein and fiber are a great way to start your day!

You Will Need:
1 1/2 cups Steel Cut Oats.  They have to be steel cut oats or they wont hold up in the crock pot.
8 cups milk- cow, soy or almond.  Alternately, you can substitute apple juice or water for a dairy free version.  I have not tested the recipe with rice or goat milk.
1/4-1/2 cup local (raw, if possible) honey (local honey helps with your allergies!)
1 tsp salt
1 tbsp pumpkin pie or apple pie seasoning (whatever you have on hand)
3 servings vanilla protein powder (optional)
Cooking spray
Large Crock Pot

Directions:
Combine the oats, salt, pumpkin pie seasoning and vanilla protein powder in a large bowl.  Stir until combined.  Add the milk, honey, and oat mixture to a large crock pot that has been sprayed with cooking spray.  Cook over night, on low, for 9 hours.  Serves 6.

Depending on how thick you like your oatmeal, you may want to add more milk to the individual servings.

Monday, October 29, 2012

Asparagus Pizza- 365 Recipe Challenge

I love pizza.  I don't love asparagus.  However, the combination of pizza and asparagus is surprisingly amazing.  Which is why, for this week's edition of the 365 Recipe Challenge, we have a super easy recipe for Asparagus Pizza that is great for Meatless Mondays.  The only way I like asparagus is either roasted or with cheese- this recipe has both.  Unfortunately there isn't enough cheese to hide the asparagus from picky eaters, but if you can get them to at least try one bite, I promise they will like it.  The crust and the cheese has the familiar pizza taste, and the asparagus is perfectly cooked.  Don't forget the balsamic dressing- it makes the pizza extra delicious!

Doesn't that make you want to love asparagus?
You Will Need:
2 pre cooked pizza crusts, I like Schar or Udi's Gluten free crusts (if using fresh dough, pre bake the crusts before adding the toppings)
1 bunch asparagus, ends trimmed
Italian seasoning
Garlic Powder
Salt and Pepper
Cooking Spray
Olive Oil
Italian Shredded Cheese
Balsamic Dressing- homemade or store bought (I like the kind that comes in the spray bottle)

Directions:
Place your pizza crusts side by side on a cookie sheet.  Spray lightly with cooking spray (or drizzle with olive oil- but go easy, you will be adding more later).  You don't need a lot, just enough to make the seasoning stick (gluten free crust doesn't like to brown and this step helps with that).  Sprinkle the crusts with the Italian Seasoning and Garlic Powder.  Cut your asparagus into bit size pieces and arrange over the two crusts.  Drizzle the asparagus with olive oil and sprinkle with salt and pepper.  Cover each pizza with 1-2 (1/4- 1/2 a cup) ounces of shredded cheese.  Bake the pizzas according to package directions.  Since the crusts are pre cooked, you just want everything to brown slightly.  Drizzle or spritz with balsamic dressing and enjoy!  Serves 4.

Sunday, October 21, 2012

Crip- 365 Recipe Challenge

Hey everyone!  Last week for the 365 Recipe Challenge I posted a dip, so this week I am switching gears and posting a main dish.  This week I have the recipe for one of my all time favorite breakfast foods- Crip.  Actually, it is called Creamed Chipped Beef, but when I was a kid I got the name mixed up and called it Cripped Cheamed Beef and it as since been shortened to Crip.  I really hoped to have a picture this week to show you all of it's creamy, beefy goodness- but I can't find the dried beef in my local grocery store.  However my mom can get it where they live and since she is the best at making this, I just had her write down the instructions for me.  I know the name sounds weird, but if you love biscuits and gravy, you will love this.

You Will Need:
1 package of Carl Budding Beef (generic brand is also fine)
2-3 TBLS of butter
2-3 TBLS of flour
1 cup skim milk
1 cup of 2% milk
Biscuit, bread or english muffin per person.

Directions:
Melt the butter in a large skillet.  Chop the meat into small pieces (easily done if the meat is frozen-no need to thaw before cooking). On medium high brown the meat in the butter until is is dark.  Add the flour until all the butter is absorbed.  Once the flour is absorbed into the butter, turn down the heat to simmer and add the milk.  I use both kinds because the 2% helps to thicken the "gravy" a little.  If the gravy gets too thick, add a little more skim milk.  Stir occasionally to prevent the meat from sticking.  This step usually take about 15 minutes. I use this time to get the bread started.  Enjoy it over biscuits, english muffins or toast.  Add pepper to taste.  Serves 2.

Having attempted to make this many times and never having it come out like my mom's, I can offer a few extra tips.
1.  The combination of 2% and skim milk is important.  You can swap out the milk for canned (evaporated) milk, but the measurements are different so there is a lot of trial and error.
2.  It really does take 15 minutes.  Don't try to turn up the heat to cook it faster.
3.  You don't have to use beef, you can also use turkey, but it will come out sweeter.  You don't want to substitute regular lunch meat though.
4.  The Carl Budding Beef is almost always near the lunch meat/hot dogs- and pretty cheap so when you find it, stock up and freeze it.
5.  We use gluten free flour instead of regular flour.  Works great!
6.  Some people like really crispy, rock hard toasted bread that stands up to the gravy. Some people like soft fluffy bread that falls apart once you cover it in the gravy.  English muffins and biscuits are my personal favorite.
7.  Do not add salt.  If you use the dried beef, it should be salty enough.  You can always add salt after it is served.

Sunday, October 14, 2012

Buffalo Chicken Dip- 365 Recipe Challenge

Today I have another dip recipe for you.  I wasn't sure what to make, so the girls over at 365 Days of Recipes suggested a football party food.  Last week we did a SpinachArtichoke Dip that is my personal favorite, so this week I am making Buffalo Chicken Dip- my husbands personal favorite.  Usually, I make both of these when we have a big party.  If you halve the recipe you can fit it in a mini crock pot, but you will probably run out of dip!  I first saw this recipe on the Rachel Ray Show, but I have changed it a little bit to suit our tastes.  We like to serve it with celery sticks, but chips or Fritos work great too.

You Will Need:
2 blocks 1/3 less fat cream cheese
4 cups shredded chicken
1 cup Franks hot sauce (2 small bottles, or most of a medium bottle)
1 small bottle ranch dressing
1/2 cup shredded Monterey Jack Cheese
Crock pot
Cooking spray
Celery

Directions:
Spray your crock pot with cooking spray.  Do not forget this step!  Alternately, you may use a crock pot liner.  Mix together the shredded chicken and hot sauce and set aside.  Spread one block of cream cheese on the bottom of the crock pot.  Arrange half of the chicken mixture on top of the cream cheese. Pour just enough dressing over the chicken so it is evenly covered.  You don't need a lot, so go easy on the dressing.  Sprinkle half your cheese over the dressing. Repeat layers with the other block of cream cheese, remaining chicken, dressing and shredded cheese.
Cook on high in the crock pot for 1 hour.  Then switch your crock pot to warm to serve.  Or, if your like me and want to get the food prep out of the way so you aren't washing dirty dishes when your guests arrive, set the crock pot on low and let it cook for a few hours.  You aren't actually cooking any ingredients, just heating them through, so really you are just melting all the cheese.  Once it starts to bubble, switch it to warm.  Serve with celery.  Serves 24.


Wednesday, October 3, 2012

Spinach Artichoke Dip- 365 Recipe Challenge

For those of you who are counting, I forgot to post a recipe last week!  Luckily, one of my cohorts in cooking, covered my butt!  Part of the reason I forgot is that I haven't really been cooking lately.  We are trying a no spend month, so there has been a lot of leftovers out of the freezer, eggs, cereal and random fridge and pantry items being eaten in our house this week.  Next week I will have to break down and go to the store, but for now, I am convinced I can feed us balance meals from the freezer.  A while back I blogged about my monthly meal plan where almost everything gets split in two, and half gets frozen for the next month to be eaten when that menu item comes around again.  That has proved to be a life saver, and I am definitely going to try to get back on track with that.  It is really nice to be able to spend the money on groceries when you have it, but have a stock pile of good food in the freezer when things get tight, hectic, or both!

Ok, so enough rambling.  For this week, I decided to share a dip.  The holidays are coming up, which means lots of entertaining.  This dip is great for a party or as an appetizer before a holiday meal.  I have even used the left overs to create a pasta sauce after the holidays.  You can even make a large batch of it, and freeze it in smaller portions.  If you decide to freeze it, I recommend getting the disposable aluminum trays that come with lids.  That way you can portion it out, pop it in the freezer, and when it comes time to serve it, just take the lid off and pop it in the oven.  Just make sure you don't cook it first. Mix it all up, divide, and freeze.  It might look manky when it comes out of the freezer, but once it all melts into gooey, cheesy goodness it will be just fine!

You Will Need:
2 cans Quartered Artichoke Hearts
16 ounces Non- fat Greek yogurt (can substitute sour cream)
16 ounces light Mayo
16 ounces Italian blend shredded cheese
2 block of frozen spinach, thawed and drained well
2 cans medium rotel
1 TBSP minced garlic
salt and pepper- optional
Zest of 1 lemon- optional
1 block 1/3 less fat cream cheese (sometimes I add this, sometimes I don't)
1/4 cup hot sauce- less if you don't like spicy food
Large crock pot or baking dish
cooking spray

Directions:
Thaw your spinach and drain well.  Be sure to squeeze out all the excess moisture.  Mix the remaining ingredients in a bowl.  Add the spinach.  Stir to combine.  Place the mixture in a crock pot or baking dish sprayed with cooking spray.  Set the crock pot to low, and cook for at least 3 hours, stirring occasionally.  Alternately, cook in the oven until brown and bubbly and transfer to the crock pot and set it to warm to serve.  Unless you are having a really big party, I recommend dividing this into 4 portions and freezing some of it. The recipe above will make a double batch.  A single batch will usually get us through a party, although that is assuming you are serving other food.

**Last night I thawed out some leftover dip, and mixed it with leftover chicken and pasta.  Just boil your pasta, drain off all but a cup of the cooking water, and mix all the ingredients together.  So delicious!**

Monday, September 24, 2012

Breakfast Casserole- 365 Recipe Challenge

Whew!  I have been so busy this past weekend, I almost forgot to post a new recipe this week.  As you may know, it is Monday, so that means another recipe for the 365 Recipe Challenge.  Today I am sharing my recipe for breakfast casserole.  I love breakfast casserole...love, love, love it.  I love it so much I forgot to take a picture before we ate it all.

You will need:
6 medium red potatoes (you can sub frozen hash browns)
3 eggs + 1/4 cup milk (or 3/4 cup egg substitute + 1/4 milk)
1 pack ground breakfast sausage (regular or spicy)
1 block cream cheese (I use the 1/3 less fat)
1-2 cups shredded cheese
bread- any kind (I have even used hot dog buns in a pinch)
salt and pepper (or cajun seasoning if you live in our house)
9x12 baking dish
cooking spray

Instructions:
Bake or boil your potatoes until cooked through.  This time, I decided to toss all the potatoes into my microwave and used the handy baked potato button- it worked like a dream.  Alternately, I have made this with store bought hash browns so if you have those, just cook them to the package directions.  Set the potatoes to the side and allow to cool.  Spray your baking dish with cooking spray.  Tear the bread into bite size pieces and cover the bottom of the baking dish.  Brown the sausage on the stove.  Once it is cooked add the package of cream cheese to the sausage.  Stir until the cream cheese melts into the sausage. Sneak a taste- it is amazing. Spread the cream cheese and sausage mixture over the bread.  It doesn't have to be smooth, just attempt to distribute it evenly.  Cut your potatoes into bite size pieces and spread them over the sausage mixture.  Spray lightly with the cooking spray, and then season liberally with the seasoning of your choice.  In a large measuring cup, mix together the eggs and milk.  Pour evenly over the potatoes. Cover with aluminum foil and bake in a 350 degree oven for 20 minutes.  Remove from the oven and add the shredded cheese of your choice.  Return to the oven until the cheese is melted.  Serves 12

That's what's for dinner...or breakfast!

Monday, September 17, 2012

Cincinnati Style Chili- 365 Recipe Challenge

Hey guys!  This 365 Recipe Challenge is certainly forcing me to keep up with this blog (however, I did forget to take a picture this week).  They say it takes 21 days to create a habit, so hopefully after a year of posting I will be in the regular habit of posting a recipe every week!  I am really trying to vary the recipes that I post, so if there is anything you would like to see, please comment below.  You can give me a particular meal or ingredient and I will see what I can make happen.

For this week, I am posting an old recipe that I have made new again.  Cincinnati Chili.  In case you don't know what it is, Cincinnati Chili is chili that is served over spaghetti.  I know what you are thinking- chili on spaghetti? Let me tell you, it is fantastic!  I questioned it at first too, but then I decided it would probably be similar to a tomato sauce with ground meat in it, and it is...but so much better! I originally found this recipe as part of a 5 meals for $50 article.  I have changed it a little to fit my family's tastes.  Usually, Cincinnati Chili doesn't have beans in it, so if you hate them, leave them out.  But, as the article suggested, adding beans increases the fiber (I always love an opportunity to add fiber), but the big reason I add them is for cheap protein.  You can get a can of beans for .69 cents (dried beans are even cheaper!).  That one can of beans makes your chili go so much further which means less money per serving.  If you are a vegetarian (or on a tight budget), you could leave out all the meat and just add more beans (and maybe some lentils?)!

Now that we have discussed beans vs. meat, I am going to drop another culinary experiment on you.  Spaghetti Squash instead of pasta.  I'm sure your considering not even continuing to read, but hear me out.  It is a great source of fiber, super low in calories (you can eat a truck load and not feel guilty), and it is a great way to hide a vegetable.  Tell your kids it is pasta, unless they see you make it, they will never know the difference.  For full disclosure, my husband can tell the difference, especially since he takes out the trash and therefor sees the skins in the bin.  It isn't his favorite food, however he appreciates how much you can shovel in for so few calories.  He just requests a really flavorful sauce on top...hence the chili.

So what have we learned today? 1. Chili over spaghetti is delicious.  2. Beans added to chili add fiber and additional servings.  3. You should lie to your children or spouse and feed them squash instead of pasta.  Okay...maybe lie is too strong of a word.  Let's  move on!

You Will Need:
1 package ground meat (I used 99% lean Turkey- we are watching our fat intake)
1 can pinto beans, drained
1 can fire roasted tomatoes
1/2 box low sodium stock (I used chicken because it is what I had, but beef is good too.  Vegetarians could substitute vegetable broth.)
1 bag frozen corn, pepper, onion and black bean mixture (optional- I got overly excited at the store)
2-4 TBSP Chili Powder (I like a lot)
1/2 TBSP Cinnamon (I know you are questioning my insanity- but do it,  I promise it is good.)
1 TBSP Cumin (check your chili powder first- it might already be in there)
2 TBSP Cajun Seasoning (optional- can sub Salt and Pepper for a milder version)
Salt and Pepper to taste
1 Large Spaghetti squash (or pasta if you must)
Skillet
Crock pot or large pot, sprayed well with cooking spray

Instructions:
Brown your meat in a skillet.  While it is cooking, season it well with the cajun seasoning.  Drain the meat and transfer to your crock pot.  Add the remaining ingredients, except salt, pepper, and the spaghetti squash to the crock pot and mix well.  Set the crock pot to 6 hrs on high.

1 hour before you want to eat prepare your spaghetti squash.  If you buy one at the store, there is usually a sticker that tells you how long to cook it.  If you get yours from a CSA like me, they don't come with the sticker (trust me, I was actually surprised not to see it- and then I felt like an idiot).  Cut the squash in half length wise and scoop out the seeds.  Sprinkle well with salt and pepper and place cut side down on a  greased baking pan.  Bake in a 350 degree oven for 45 minutes.  The skin will brown and you will be able to squeeze it when it is done.  Scrape out the inside with a fork to make spaghetti!

While you're waiting on your squash, now would be a good time to taste your chili. We haven't added any salt or pepper yet because we used a lot of processed ingredients* that already contained salt.  Taste it now and add salt and pepper if you need it.  I usually end up adding a good amount of both, but it really depends on the ingredients you started with.  You might also want to add other things depending on your preference (like more chili powder or crushed red pepper to give it a kick!)

Now, this is one of those meals where you will have leftovers of somethings but not the others.  The chili (with the beans) will make 8 servings.  One large spaghetti squash will easily serve 2 adults and 1 child, possible 3 adults who aren't super hungry.  I usually split a squash with my husbands because we like to eat, but we usually don't clean our plate.  If you are diligent, you could probably scrape out enough for 2 adults and 2 small children.

Nutritional Information for 1 serving of chili with half a spaghetti squash:

Calories: 214
Carbs: 44 (30 come from the squash)
Fat: 1
Protein: 21
Fiber: 11
Sugar: 14 (12 come from the squash)

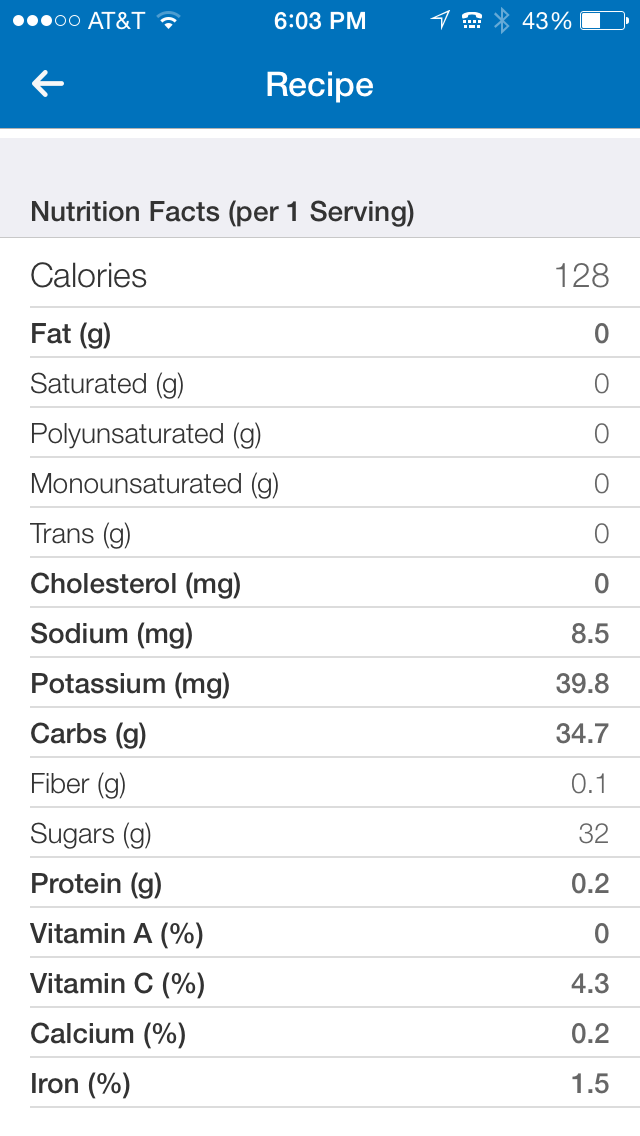
Nutritional Information for 1 serving of chili:

Calories: 131
Carbs: 14
Fat: 1
Protein: 18
Fiber: 5
Sugar: 2

I know your wondering what I am going to do with the left over chili, right?  Well I will tell you.  I found this gem on Pinterest and I have been waiting to try it until I had some leftover chili.  Well now I do.  Yum!

That's what's for dinner tonight AND tomorrow night.


*A word about processed foods...
I know some people never like to use canned or frozen foods.  Yes, fresh is best.  We even joined a CSA this year so we would have access to fresh fruits and vegetables.  It didn't fit our lifestyle.  We could never eat the fresh food before it went bad, and half the time we didn't have what we needed or we had too much of one thing.  I did end up freezing a lot of things for later use, but my point is, fresh isn't always an option.  If you can, make your own stock, use dried beans and chop fresh veggies.  If it is a choice between going through the drive through on your way home from car pool or using canned/ frozen veggies that have already been prepped for you-use the canned/frozen stuff.  A canned bean is better than a french fry any day of the week.  Don't get so caught up in all the hype against processed foods that you give up.  Just read the ingredients and buy the product with the shortest list and least salt.